Completing City Santa

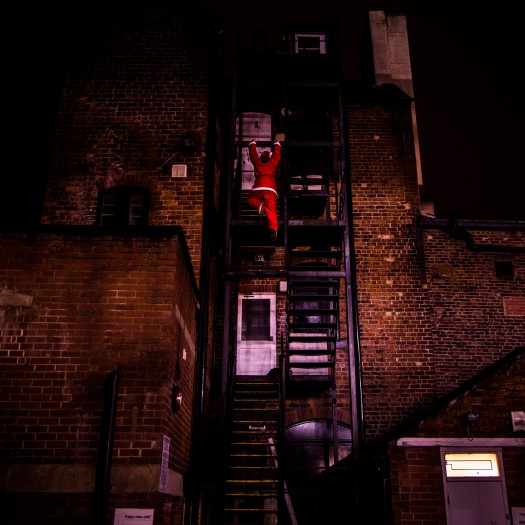
After the first shoot, in which I had not yet incorporated any breakdancing elements yet, I found that I didn’t need any, and would still work. So this is about City Santa, ‘caught in action’.

I tried to keep the editing constant and the same throughout all the pictures in terms of contrast, color, sharpness and brightness.
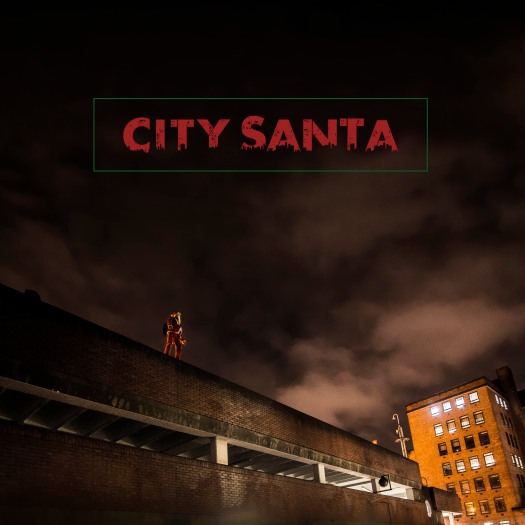
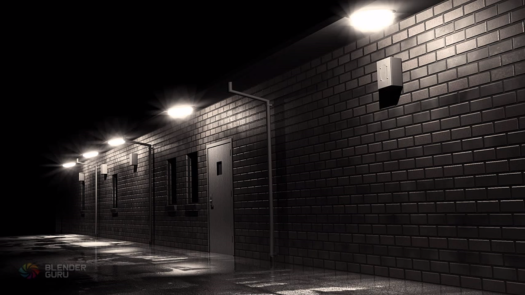
Most of the pictures came out really warm with a lot of yellows due to the street lamps. To give the story more of a Christmas feel, as well as making it seem more magical or detached from reality, I gave the book an overall red tone, along with a substantial amount of contrast.
Because all the photos were taken at night in very dark locations, I spent quite some time working on the brightness of the pictures, and reducing noise. For the brightness and exposure of the pictures I mainly used the curves adjustment layer. To reduce noise mainly used the surface blur filter(along with layer masks to restrict application of filter on certain parts of the pictures), but in some I also used the noise reduction adjustment brush.

Reducing noise has always been a pain for me.
This video by Phlearn really helped me understand the various ways to reduce noise, difference and effectiveness of each.

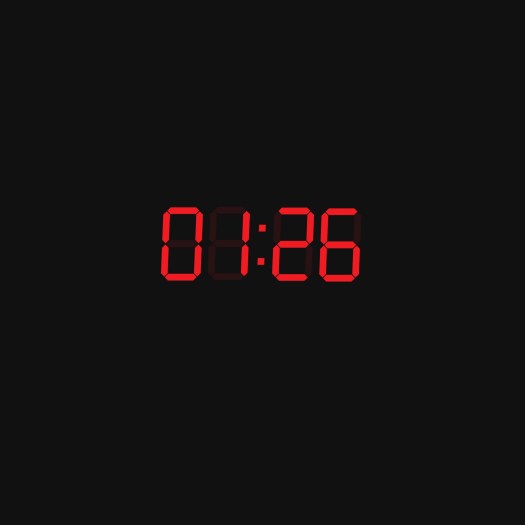
After editing, I had to then choose which photos were going to be in the book. Some pictures didn’t make much sense in the context of City Santa, so were rejected. In the end I ended with less than 20. With David’s advice, I made images of specific time displays to put into pages in between the pictures. I felt that this was a good way to keep the narrative smooth and flowing.Skyline0126CarparkHang
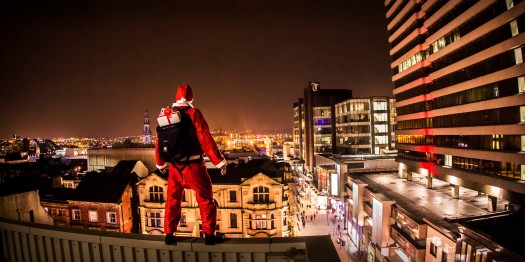
The first picture from the top(Skyline.jpg), was the only picture I used Fisheye lens to take because it distorted the image in a way which help hide some darker buildings in the front(right after where I stood) and helped give the skyline a grander, wider, and brighter look.(Same image using regular wide angle lens is posted in the ‘location scout 1’ post)

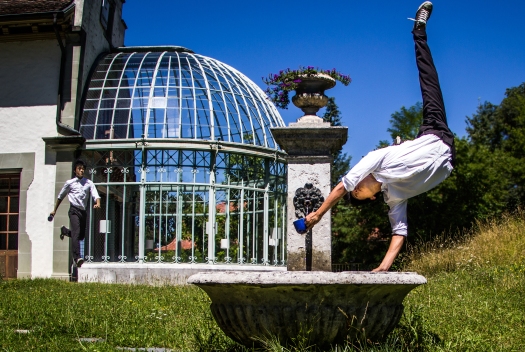
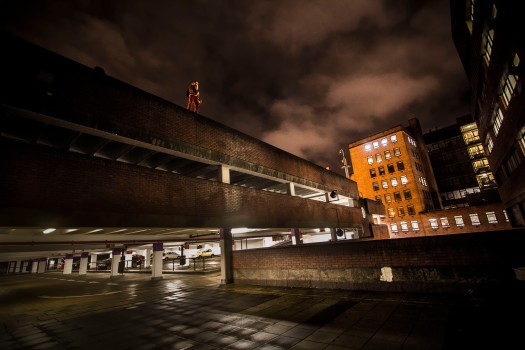
For the cover of the book, I used the image ‘carpark'(3rd from top). I cropped off the bottom of the photo and used the clone stamp tool and the gradient tool in Photoshop to create/extend the sky. For the title I used a font I found online called urban jungle.
cover.jpg

Artist research : Littleshao

I first discovered Littleshao through a picture he took with one of my favorite dancers. Littleshao is a french photographer who works heavily with dancers and athletes, often covering dance and music events, but also does weddings, portraiture, etc. This picture he took caught my full attention with its color, light, and movement, which I thought portrayed an image of dance beautifully. This really pulled me into looking at more of his work.
cloudlittleshao
(littleshao is the first dancer from the ground.)
In his pictures, his subjects are always well lit. This is something I have been struggling with for as long as I’ve had my camera. Many times after having found the perfect location and the perfect subject to shoot with, if there is anything that could ruin the picture completely, it would be the lighting. At one point, I was convinced that it was extremely difficult or even close to impossible to take a good picture in the afternoon when the sun was shining directly from above. Because the light always created really harsh shadows, and often across the faces of my subjects(though this only applies to the summertime or tropical countries such as Malaysia when the sun actually gets directly above our heads). This is an example of a picture taken 3 years ago. (I do now realize that lighting wasn’t the only thing bad here, a different angle of the shot might have improved the picture as well)

Diputari,-potongi,-rasa-dah-betul
(I do now realize that lighting wasn’t the only thing bad here, a different angle of the shot might have improved the picture as well)

Although it did help to choose the time when the sun was in better positions to take pictures, the weather is always varying which still made things difficult.

After looking at Littleshao’s work, I realized that he would  take his pictures at anytime throughout the day, wherever the sun was shinning from, and still produced stunning images. In a video portrait of him, he mentions :
“I would say there’s two ways I’m taking pictures, the first way is to take pictures in natural light, trying to represent as best as possible the ambient that I have in front of me. And the other way is to use artificial light because I really like to create an ambient that people are not used to seeing. When I use artificial light, it’s easier for me to freeze the movement and to focus the light on the subject”

Lighting made all the difference. Although I did get some equipment out of the photography department on a Christmas loan, the one thing I missed out on is a speedlite or any portable flashes.

City Santa shoot 2

This shoot presented more problems than the last. Some shots did not work the way I imagined it to be, for example in the photos ‘seying1’ and ‘seying2’, the gap between the wall(?) and ceiling was too small.This really gave me a hard time getting into a …’vigilant'(?) or even comfortable stance. Also, on the roof top the surfaces were wet and slippery as it rained early during the day, which made it quite difficult for me to stand on top of them. Because of this I was not able to get every shot I planned.

Santa Shoot 1

I decided to rename Bboy Santa with City Santa.

“Kids today are demanding a newer, hipper, more bad-ass Santa Claus” -Will Ferrell as ‘the new Santa Claus’

Instead of a giant Santa gift sack, my Ciy Santa has his gifts stuffed in his modern bottomless rucksack, allowing for greater mobility for his climbs.


Location scouting for Santa 1

Santa is usually unseen and does his work at night. So my pictures had to be taken during the night time, in dark locations filled with shadows, but yet have some source of light to illuminate Santa  since I am without any flash or artificial lighting equipment. I was also looking for the colors red, green and white in locations.

Found quite a few locations today, but many more to find. All the darker locations found today had some light I could place Santa under.

Bboy Santa?

B-boy Santa was introduced to me when a friend Michele showed me a video of him break dancing in the city in a Santa costume. Later I thought I could use B-boy Santa in my photobook, having him being main focal element of the collection. To test this idea, I took a few shots of different break dance freezes(or poses) with different lenses. Having already done similar pictures in the past, shooting it didn’t present many problems, but the problem was that it didn’t make much sense, I thought. Why would Santa be break dancing? And if Santa does break dance, what does it mean?

I soon realized that the idea was a blurry one, and for it to make sense, I had to introduce some restrictions.

The popular Santa that we all know rode a floating sleigh, which in other words meant he could fly. My Santa was not going to fly.
Santa is usually unseen and does his work at night. So my pictures had to be taken during the night time, in dark locations filled with shadows, but yet have some source of light to illuminate Santa…

Understanding Composition

In the video ‘Understanding Composition’ by Blender Guru on Youtube, a CG artists talks about the importance of composition in an image and the different stages in composing an image correctly to guide the viewer to whats important, as well as creating a pleasing and visually attractive image. The 3 stages he talks about are : Focal element, Structure and Balance.

“Focal elements are so vital to a scene, because without it the viewer is left bouncing around the image, wondering what the whole point of the image is”.Struggling to come up with an idea for my photobook, this sentence helped direct my thinking in the right or at least some direction, and that was to focus on having a consistent focal element throughout my collection of photos. He shows us an image of his own, which was a CG image of a brick wall, well lit and well textured, but points out that the image was “likely to get closed within seconds by the majority of people, for the right reasons”. Looking at the image myself, I couldn’t agree more, I would have quickly rejected it. It was a beautiful wall, but a boring image.Screenshot (3)

In order to make something stand out in a scene, or simply in order to create a focal element, Blenderguru lists a few things to pay attention to including high contrast, such as a silhouette, saturation, if something is more saturated it stands out from the rest, motion, viewers are naturally attracted to things in motion, faces or figures and camera motion. He then reminds us to also be wary that these elements can also be used incorrectly and might distract a viewers attention away from the main subject, for example objects with high contrast can become the focal element even if you didn’t want it to.

Initial Photobook Idea

The first idea for my photobook came to me when I was out shooting one day in the city. I took a photo(IMG_2826) of two women glancing into an alley where I was standing. The contrast between the brightly lit streets and the shaded alley gave the picture an interesting framing, which I thought I could try recreate in different locations around the city. But this was not so successful.

For the next few photos I used public rubbish bins, restaurant windows, and a carpark fence to produce the same effect. I used a 50mm lens to flatten the images, bringing objects or people far away closer and into attention. Looking back at the pictures,
I realized that what mainly made the first picture stand out were the two woman synchronously looking right into the camera, both with the same candid and curious look across their faces, making me feel like I was being watched. This element was missing in all the other pictures, and on top of that I was running out of objects to shoot through.