Group meeting 1

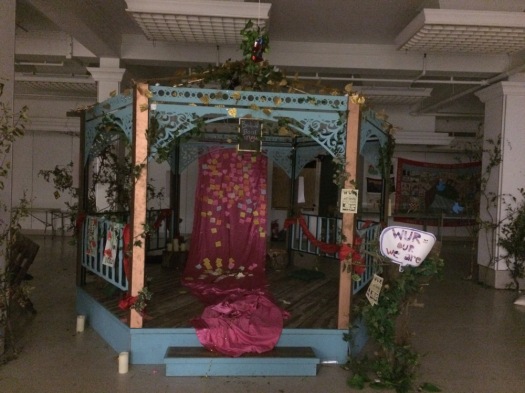
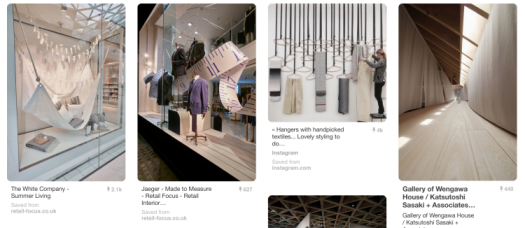
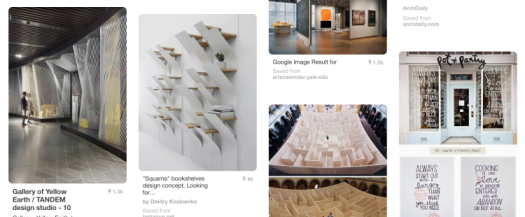
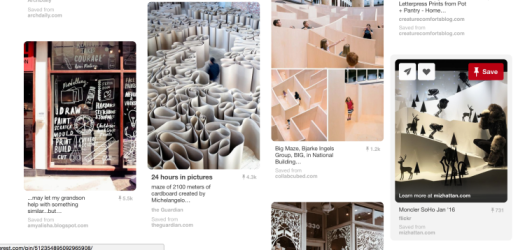
Through group discussion and research we came up with the idea of turning the space into some sort of maze, inspired by the Pinterest images below. The maze would lead the audience into different sections. Each section would have its own ‘theme’ – similar forms of works( prints, 3D objects…) might be exhibited together in one section, a bit like a departmental store, or works might be grouped by having a similar subject, like book stores.

screen-shot-2016-11-25-at-1-43-25-pmscreen-shot-2016-11-25-at-1-43-35-pm-1screen-shot-2016-11-25-at-1-43-45-pm

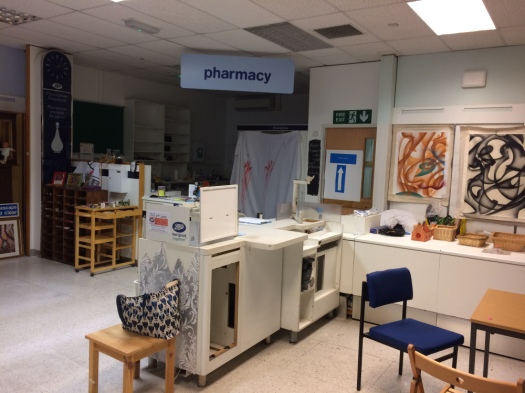
It was important to keep in mind that we were working with a budget.

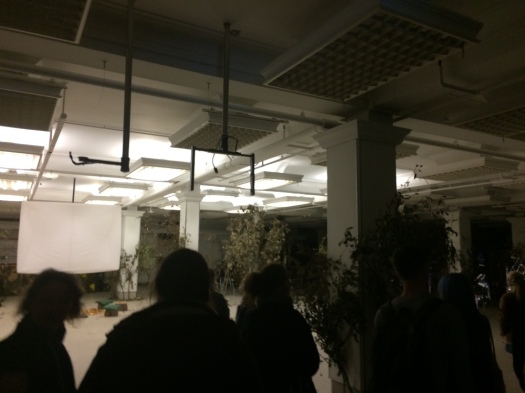
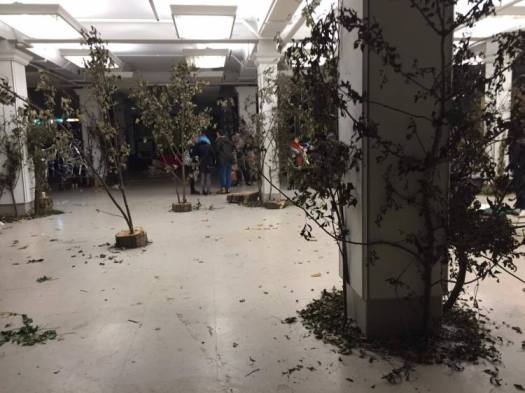
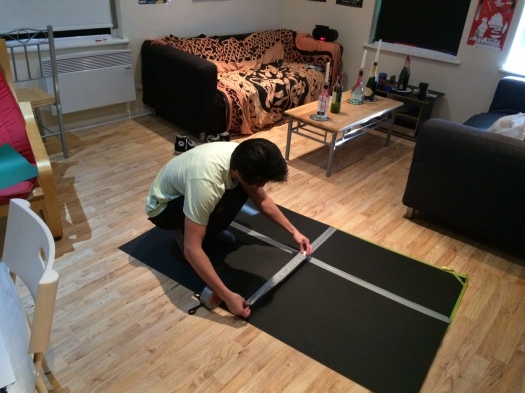
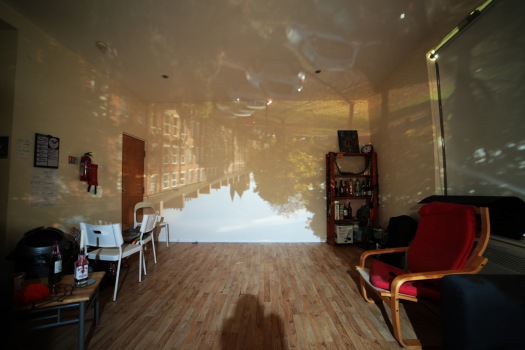
We thought to use white sheets of cloth to construct the maze, and have the sheets clamped onto the ceiling by the foam boards and the ceiling frame. We all felt that the store was very dark, and that we needed extra lighting. Using lights from the AV department might be a good idea, perhaps the ones with the square LED panels,  placing them before the walls and pointing them upwards towards a reflector or reflective material attached to the ceiling at an angle which would illuminate the space below with a soft and indirect light. Adding blue gels over the lights could give the space a more wintery feel, which was what we were trying to achieve. To make it more winter like, we decided on snowy foot prints that would lead audiences into sections, and also having fake snow all along the paths.15231645_10205973617379119_1348925647_o

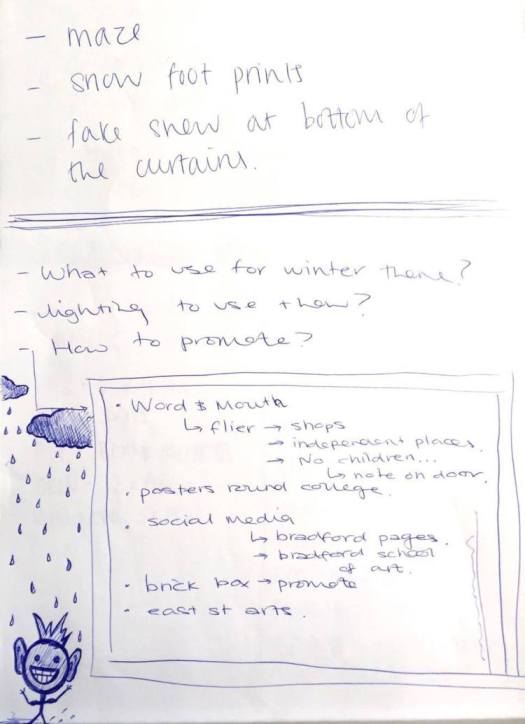
We also discussed about how to promote the event, which is recorded in the image above.

The Wild Woods of Bradford

“People from Bradford and beyond were invited to explore a once familiar clearing in Darley Street, transformed into an enchanted forest where the creative spirit of Bradford grew free.”

After visiting Rebooted we visited another empty space along the same street that was recently used by The Brick Box, who created the event called ‘The Wild Woods’ as part of Bradford’s Season of Light.

Seeing the space then,

img_056415224809_10205973226089337_468893751_oimg_0574img_0571img_0576

..it was difficult to imagine how it might have looked during the event.

I found a video of Wild Woods online. It looked amazing in the video ; a lot of the positive feedback were about the space, and the atmosphere it created. It seemed like a successful event, and it was inspiring to listen and learn from Eleanor and Rosie on how they transformed the empty space into the wild woods that it was without much of a budget. They shared with us some of their extremely resourceful and clever ideas ; the trees and branches were procured from a park ranger, either free or very cheaply, the constructed a large projection screen with just a bed sheet and PVC piping.

ReBooted first visit

My first impression of the space was that it was very dark, but I thought this problem could potentially be fixed. It had a lot of open space which could facilitate an ‘art exhibition’ well.

screen-shot-2016-11-21-at-17-11-54screen-shot-2016-11-21-at-17-12-30screen-shot-2016-11-21-at-17-12-22

img_0538
I thought the dark space behind the counter/pharmacy sign could be turned into a little cinema where the moving images would be displayed


15240053_10205973293331018_1146275307_n

The Camera Obscura Phenomena Live

It is understandably difficult to imagine and grasp the fact that an image can be produced from simply 2 things : a completely dark box and a tiny whole. So to better illustrate the theory and to endorse peoples understanding I decided to turn my living room into a camera obscura, and recorded the phenomena with a DSLR( because room is extremely dark, high ISO and exposure time required).

img_1878
Stitching up black boards to cover the windows.

img_18793q2a90173Q2A9023.JPG

I plan to display this last image at the exhibition, to show that you can create an image with any dark room and a small hole, even your own living room! This is a very easy way to create something so stunning, something you’d normally never see. This could be something for the family to do together over Christmas, and is sure to amaze and inspire both children and adults alike.

I was inspired by these videos :

Calculating Exposure Time

I was offered a Pinhole Exposure Calculator by Alex from Photography Department

img_1921

On the calculator, one can set the ISO, and aperture. But for its light intensity variable it depended on only 5 different intensities shown in the image below. I felt very uncertain using this because given only 5 different intensities, with very vague indicators namely sunny, mostly sunny, cloudy, very cloudy, indoors, it was definite to have huge margin of error. Which it did, and by using this many of my tests were over and under exposed.

img_1920

From diyphotography.net I learnt to calculate my exposure time manually. This is done by getting a shutter speed from an SLR camera set at f/16, then multiplying the shutter speed by 2 for each f-stop cornerstone value increase. For example, with the Robert Rigby camera which has an f-stop value of 166, I first round off f166 to its closest f-stop cornerstone value of 176. And from f.16(which is f-stop on my SLR) to an f-stop of f166, the f-stop value jumps 7 times ( 16,22, 32,44,64,88,128,176), hence, the shutter speed on my SLR camera is to be multiplied by 2^7 for the exposure time on the Robert Rigby.

ph006

But what I got from the website did not take into account the ISO difference. I did the same multiplication for the ISO difference by doubling or dividing by 2 for every ISO cornerstone value difference. For example, when I began shooting with 120film which had an ISO of 400, when the film in my SLR camera had an ISO of 200, after accounting f-stop difference, I would divide the exposure time by 2 .

This type of calculation is of course not perfect, and also had its own uncertainty values. But in my experience, this was a more accurate method of determining exposure time.

This night time shot below is a result of the manual calculation just explained. This picture took an exposure time of 8.5mins.

img_1922


Pinhole Practice 2

In addition to the Robert Rigby camera, this time I also used a black pinhole camera from Photography workshop in Vernon street which has a longer focal length, hence lesser wide angle than the Robert Rigby and will take a longer time to expose the image correctly.IMG_1915.JPG

Using photographic paper which has a very low ISO( paper I used had ISO 7), the exposure time needed would be much longer than using film. It was a cloudy day, which required an exposure time of at least a few minutes. This meant that anything moving in the frame will either be blurred or completely disappear from the image. With this effect, I decided to take a photograph of Leeds Trinity. Even though it was extremely crowded, not one person could be seen in the centre of intensive shopping. I thought this could relate to the empty stores in Bradfordimg_1909img_1911

Unfortunately, this try did not turn out too well. There were too much that were in the shadows in the mall, and most of the image turned out too dark. In the first image, the outside is very well exposed but the inside is way to dark. This was shot on an exposure time of about 3 mins. In the second image, which I exposed for 4.5 mins, the outside is overexposed and washed out but the insides were still very dark.

img_1912

This image is taken with the Robert Rigby camera which was quite well exposed but once again the ledge appeared against my expectation.

Physics of Pinhole Photography

Physics is my favorite science. In fact, it is my favorite subject all throughout secondary school and A-level. So it was nice to try to understand some physics again.

From ‘The Comprehensive Tech Guide to Pinhole Photography’ by http://www.diyphotography.net and ‘How a pinhole camera works’ by http://www.alternativephotography.com

I learnt how to determine the focal length of any pinhole camera from the diametre of the camera using the formula:  focal length = (pinhole diametre/0.03679)²ph001

Next, I learnt that the view angle of the pinhole which is the widest angle that light can make it through the hole. Using right angle trigonometry and the tangent rule, the view angle can be determined from the diameter of the hole and the thickness of the material.

tan(view angle) = [(diameter/2)/(thickness/2)] x 2

This is extremely important information because with it and the previously determined focal length, I can then resolve the image diameter at the focal plane which will tell me how much of the film or paper is covered with an image. Using the formula :

image diameter = 2 x (focal length) x tan(view angle)

ph02ph003ph005

I learnt that the shorter the focal length, the wider the angle of view. So if I wanted to take a wide angle picture, I should use a pinhole camera with a shorter focal length, a ‘flatter’ pinhole camera. And if I wanted a more telephoto image, I should use a camera with a long focal length which will zoom the image. This is illustrated in the images below :-

ph007ph008

Learning the physics of pinhole gave me an thorough understanding of the relationships between the variables such as focal length, pinhole size, etc. and an understanding of how cameras work in general. This help built my confidence in taking pictures with the pinhole camera.

Links:

http://www.diyphotography.net/the-comprehensive-tech-guide-to-pinhole-photography/

http://www.alternativephotography.com/wp/processes/pinholes/how-a-pinhole-camera-works


Pinhole Practice 1

I consulted Madeleine from Photography workshop before shooting. She gave me brilliant advice, most important of which was to keep testing and making notes of what I did for every picture. I was very uncertain about exposure time, so I did tests of the same shot with different exposure times. I used the Robert Rigby camera which uses a darkslide to hold the photographic paper or film. I used photographic paper. These were taken on a “mostly clear” and sunny day.img_1913

img_1845img_1847

img_1914
Marking the exposure time on one side of the darkslide
img_1907
From top left, exposure time : 2mins, 90 secs, 60 secs, 30 secs
img_1908
The most well exposed was 90secs

The Robert Rigby camera produced a lovely vignette around the pictures. The pictures were more wide angled that I expected. I did not expect to see the ledge or the buildings on each far side of the picture.

Following Madeleine’s instructions, I recorded the exposure time of each picture on the darkslide, then marking the papers in the darkroom before throwing them in the developer. This way I can know which pictures were exposed for how long. After developing in the darkroom, Madeleine taught me how to produce a positive print from the negative image using an enlarger in the dark room.

Constructing a Pinhole Camera

I’ve decided to construct a few pinhole cameras plus instructions on how to take a picture with the camera which will be part of the exhibition along side my pinhole photographs and the digital image of the camera obscura effect in my living room. The instructions will be simple enough for both children and adults to understand.

I learned how to by watching the following videos:

I got the template for the camera from The Royal Institution website.

img_1891
I modified the template to fit a 4×5 film or photographic paper. Then drew out the template and gently scored along the dotted lines.
img_1893
Cut on the template, and cut out a small rectangular hole on the front side of the camera.
img_1894
I painted the insides black to make it light safe.
img_1896
I cut out a rectangular piece of aluminium foil from a beer can.
img_1897
Pricked it with a pin.
img_1898
Stuck the over the rectangular hole.
img_1888
Drew out the cover template
img_1889
Cut and folded.
img_1924
Folded and painted the insides black
img_1925
Folded the box.
img_1901
Creating the shutter.
img_1906
Opened shutter.
img_1904
Closed shutter.
img_1923
Pinhole Camera

I plan to take pictures with this camera using 4×5 film. With its the film’s higher ISO of 400 compared to the photographic paper of ISO 7, the exposure time will be much shorter allowing me to produce images with different effects. Bought myself a box of 4x5in film.IMG_1926.JPG

My pinhole camera How-to below. Multiple of these will be printed to be given away with each pinhole camera.

Pinhole Instruction.jpg


Pinhole Artist Research : Ilan Wolff

Pinhole artist Ilan Wolff creates beautiful images with funky distortions by curving and bending the color paper that he mainly uses to shoot with. He is another photographer who pushes the artistic possibilities of the simple, homemade pinhole camera.

“Since 1981 Ilan Wolff has specialised in creating photographs using the Camera Obscura technique with cameras made from old boxes or cans.  Nowadays he mainly uses his van and ordinary room interiors to create large images. Since 1993 Ilan Wolff has been giving regular workshops in Pin Hole photography with the Camera Obscura and using photographic emulsion to create images on different surfaces.” -Ilan Wolff biography


ilan001ilan002ilan003

ilan004
There are thousands of pictures of the Eifel tower, many of which probably has a 100 others which look just the same, but there will only be one that looks like this..
PINHOLE - STENOPE
Same goes for this absolutely stunning picture of the over-photographed Brooklyn Bridge

I never knew these imposing imageries were possible with a pinhole camera. In fact, they are only possible with a pinhole camera.